
Problem is, I have not had much time lately to keep things updated!
So bear with me please!
We had another horseshow last weekend: Ark-Mo Show of Champions.
Good & muddy times!
More on that later.
I want to post this fun tutorial that I put together with my September mini album from Crazy Daisy Kit Co. That album is awesome. I am working on the inside pages as a year end wrap up for Alex's 2009 horseshow season.
The album has a variety of pages inside including envelopes, folders, transparencies, and tabbed pages. The cover was plain kraft so I thought it was perfect for this great technique I learned and altered from the wonderfully brilliant & talented Brazilian artist, Lucy Folch during SIStv's National Scrapbooking Day blog party back in the Spring. She has such innovative ideas and I am always awed by her art.
I have modified mine a little but I must credit Lucy with the basic gesso - paint - rag technique.
So without further adieu:
Here is the Making Memories kraft album included in the September kit, but you can also do this on a heavy chipboard or cardboard.
The key to this technique is pre-planning the layout.
 Gather some chipboard pieces and any other items that you want to include on the layout and place them where you want them.
 I used the cute paisley pieces in the kit, along with some other pieces from my stash.
 Since this is going to be an album for Alex's end of season horse shows for this year,I wanted to use the horse piece I had from Martha Stewart, but I peeled off the slick pattern from the top so my gesso will adhere. I put the horse on the back of the album.
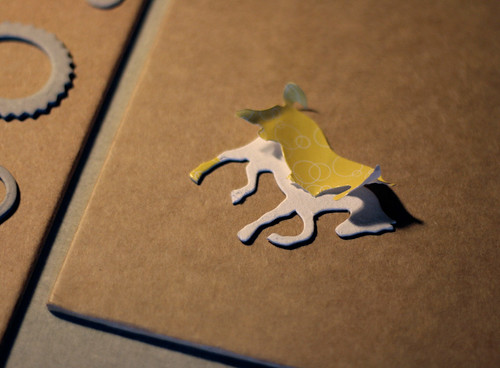 Next, since I want to add some pieces of patterned paper to my finished project, I need to measure and cut those out before adhering my chipboard. I also made a quick sketch of my layout and numbered my pieces to correspond with my cutout paper for easy placement later.
  Once I have my layout how I want it, I start gluing down all my chipboard pieces. I did not glue the word "ALEX" down yet because I want to use those awesome 7Gypsies letters as they are.
  After the glue is dried completely, cover the entire project in gesso. Get it in every crevice and corner of the chipboard pieces. I use a smaller dry brush to get any excess out of those same crevices and corners.
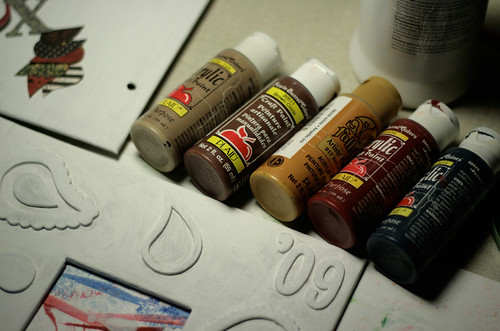
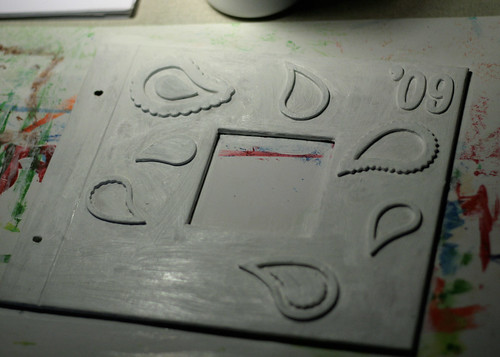 Now let the gesso dry completely while picking out four or five colors of acrylic paint to coordinate with the paper and other pieces.
 This is the really fun and messy part of the project - let your creativity run wild!
 You will need to use a thin consistency with the paint, you may want to experiment on a scrap piece of chipboard or cardboard first. I began on one side and worked with a color then switched to my next color and so on to blend each color together. Just keep working with the paint until satisfied. Don't worry, it won't be perfect!
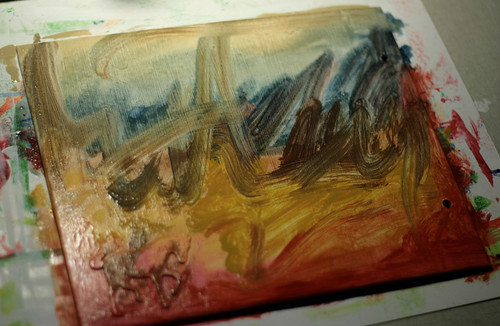 Next take an old rag while the paint is still wet and wipe and dab the project to remove some of the paint. If you remove more than you want, just add more paint. If the paint gets too dry, wet your rag - this method is mistake proof!
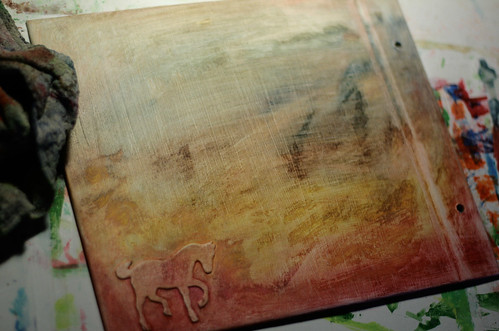 When you are happy with how it looks, let this part of the project dry. You might want to add some glimmer mist or another mist of choice to jazz it up.
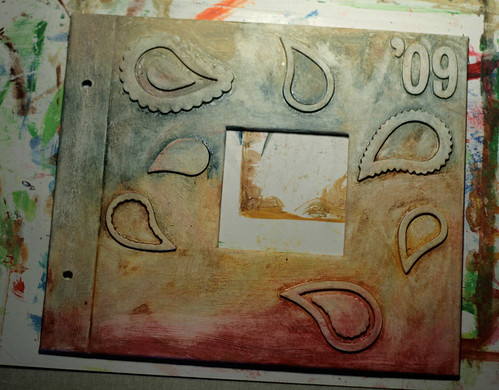 Once dry, you can add on everything else. I distressed my pattern paper and glued it down. I also distressed my chipboard letters with a small emery board and some paint and glued those down.
 As an afterthought I decided to use the Stickles that were included in my kit, and I love how they look on this project!
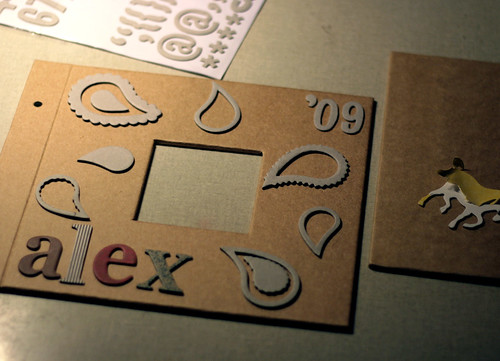
  Once that dried, I got my Sharpie out and outlined, added a photo in middle and used some Ranger Glossy Accent that I had in my stash on the word "ALEX" so it would have some shine to match where I used the Stickles.
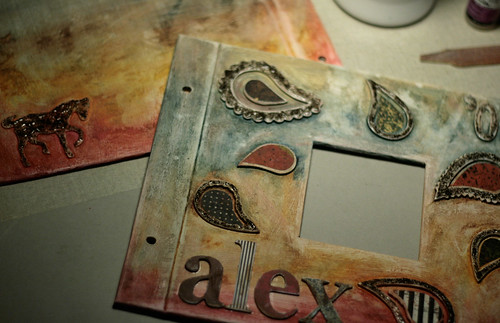


The album is now finished and ready for my pages to be done inside! 


7 comments:
Ok, I have decided I love U even more today!!! WOWWWWWWWWWW!!! This is AMAZING!!! I am GONNA to have TO try THAT!!! WOW! :):):):):):):):):):):):):)
Just love how you did this - I made a layout when Lucy taught us this technique but haven't used it again. It worked perfectly for the album cover, and I really like the rich colors you used.
Great tutorial! and what a cool effect!
That is SO pretty! Love it!
Wow -- that's amazing. Your talent is really impressive
COOL, COOL, COOL! That's just stunning & such a perfect technique for those photos & memory!
Have a GREAT weekend, Kim! :-)
wow!!! you got a lot done!!!! thanks for sharing all of those tips!!! :)
love how it turned out! :)
hugs,
sarah.
Post a Comment